This set of pages describes how to develop (new) sources for the CommunityMashup.
| Inhalt |
|---|
Setting up the development environment
We are using Eclipse as (Java) development environment.
...
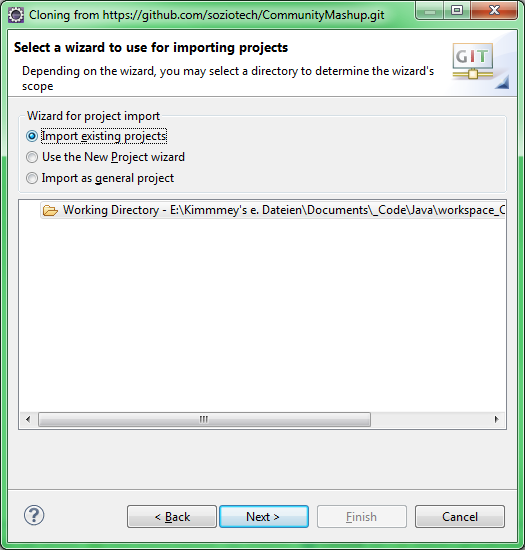
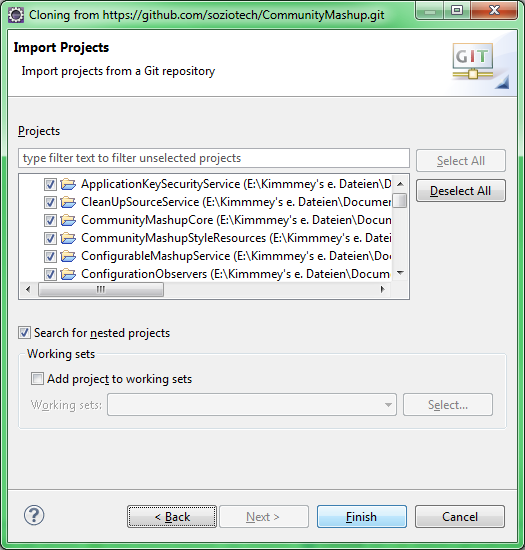
- Import existing projects -> Next -> Finish


If there are problems compiling the sources, please check in the Eclipse Workspace Settings that the (Java) Compiler compliance level is set to "1.6" (or higher).
Checking out source code for additional sources
The CommunityMashup core already includes source code of the public sources -
...
- File->Import->SVN->Checkout Projects from SVN
- Browse projects in https://vcs.cscwlab.de/svn/communitymashup/trunk
Creating a new source
Create new project in Eclipse
Usually, you just have to right-click in the package explorer - and select New -> Project
...
Project structure
The new project should have the following structure:
Share project
Now you should import the project to a source code management service - in our case SVN:
...
In some SVN plugins you may now have to commit the initial import - in others this commit already did happen (and you had to specify a commit comment ...)
Include needed components
- Open the file META-INF/MANIFEST.MF in the project.
- Change to the tab "Dependencies"
- Add in Required Plug-ins the following projects from your workspace (you should have set up your workspace before ...):
- org.sociotech.communitymashup.core
- org.sociotech.communitymashup.source.SourceServiceFacade
- Add in Imported Packages
- org.osgi.service.log
- Save the changes!
Create main class
Create a main class for the new source: right-click in your project: New -> Class
...
Do not forget to add the newly created classes to the source code management system ...
Implement functionality
Initialization
- Open the new class.
- Implement the method initialize() to do everything that is needed to initialize your source:
- TBD add source
- Important: Call super.initialize() to continue the initialization after you have finished your stuff.
Comments on using / creating Items
In the fill phase of the sources the main task is to create Item objects and add them to the DataSet (and to other Item objects).
...
- > DataFactory factory = DataFactory.eINSTANCE
- Now create an empty Item object using the appropriate create method of the factory
> person = factory.createPerson() - Now use the add-methods of the new object to add any information that might be needed to specify with which objects to merge the new object - e.g. name, alternativeNames, Identifier objects
> person.setName(xxx)
> person.addAlternativeName(xxx) - Then add the object to the DataSet using the sources add method:
> person = source.add(person);- in an optional second parameter of the add function you can specify a value for the Items ident attribute
- when the object is merged, the function may return the reference to a different object!
- Now add all other data (e.g. MetaTags)
Implementieren
Quellen Initialisierung
- Öffen Sie nun die zuvor angelegte Klasse
- Sie können nun die Methode initialize() wie folgt überschreiben und um zusätzliche Schritte, die speziell für Ihre Quelle notwendig sind, erweitern:

- Wichtig: Rufen Sie nachdem ihre Initialisierung erfolgreich war immer super.initialize() auf.
Activator implementieren
Die Activator Klasse kontrolliert den Lebenszyklus jeder Quelle.
- Erweitern Sie die Activator Klasse in Ihrem Projekt und lassen Sie sie von SourceServiceActivator aus dem Paket de.unibw.cscm.communitymashup.source.impl erben. Dadurch muss das Interface BundleActivator nicht mehr implementiert werden.
- Überschreiben Sie die Methoden start und stop bei Bedarf um zusätzliche Schritte beim Starten ihrer Quelle durchzuführen.
- Beispiel: Sie könnten einen Thread starten, der regelmäßig einen externen Dienst auf Änderungen überprüft.
- Wichtig: Rufen Sie immer super.start mit dem übergebenen bundleContext und einer neuen Instanz ihrer zuvor anglegten Hauptklasse auf.
- Beachten Sie: In diesem Schritt wird die Methode initialize ihrer Hauptklasse aufgerufen. Anschließend wird der Service der Registry bekannt gemacht und kann vom Mashup verwendet werden. Überlegen Sie sich also an welcher Stelle innerhalb der Methode start Sie diesen Schritt ausführen.
- Räumen Sie innerhalb der Methode stop wieder auf.
- Beispiel: Stopen Sie Threads die Sie innerhalb von start gestartet haben.

Testing the sources
To run the CommunityMashup Demo configuration, the following steps are required
- Run -> Run Configurations
- New OSGI Framework Run Configuration
- Deselect all Bundles (in Workspace as well as in Target Plattform)
- Select the following bundles:
- ConfigurableMashupService
- MashupFactoryService
- RESTInterface
- CleanUpSourceService
- FeedSourceService - or another SourceService you want to test
- ConsoleLogListener


- Set the Start Level of the ConsoleLogListener to 1
- Click on Add Required Bundles
- Go to the Arguments tab and add the following to VM Arguments
- -Dorg.osgi.service.http.port=8080
- -Xmx1024M
- -Dorg.sociotech.communitymashup.configuration.file=demo.xml

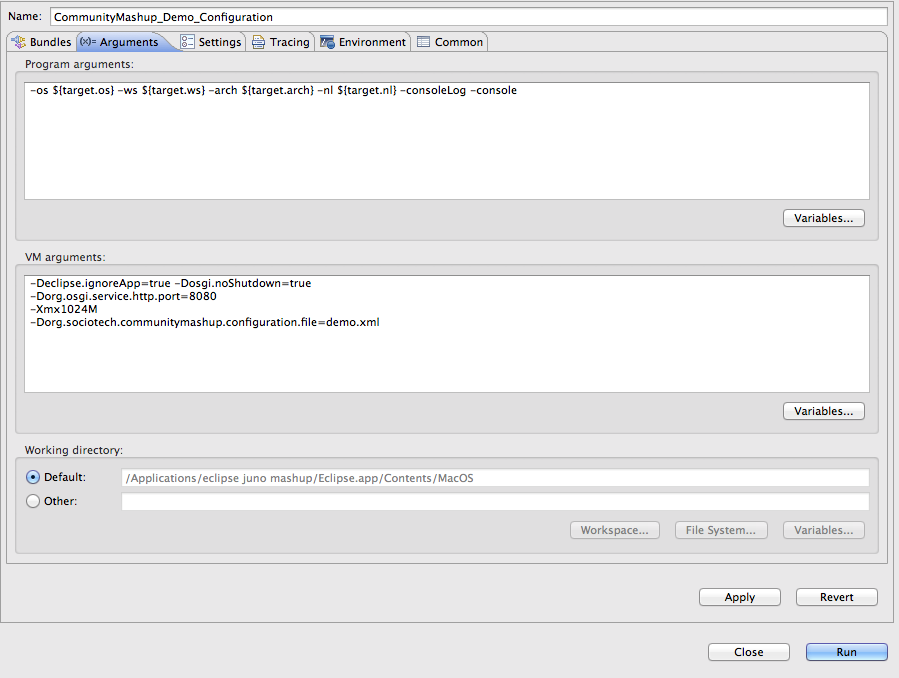
- Click on Apply to save the Run Configuration
- Click on Run to execute the Run Configuration
- Direct your browser to http://localhost:8080/mashup to see the result.
In Step 7 you link to the mashup configuration file. This has to be put in "MashupFactoryService/configuration".
Packing updated sources for using them in a CommunityMashup installation
- Select the source project - right click: Export
- Plug-in Development / Deployable plug-ins and fragments -> Next
- Specify any directory
- In Options: "Package plug-ins as individual JAR archives" should be selected
- Finish
...